Week 1 - The Final Stretch
- Leighanne Fernandes

- Oct 4, 2020
- 4 min read
We are back again, and all set to finish this project with our best efforts. As expected, I worked during the break to complete a few tasks such as the CG shot for the Locked in Music video and get some of the textures done and out of the way. Hoping that this will ease out the pressure and improve the workflow efficiency for the term, I did my best during my break to balance rest and work.
Progress during break
I worked on the CG shot by first finalizing textures on the character. Using toon shader was a challenge as it was very new to me and there aren't as many resources available online for it. However, I did my best to try and test it out with the best functions.
From a more technical side of things, I tried playing around with the actual shader itself but the specular results were horrible. It made everything look super flat. I then tried using a normal shader for the skin (Fast SSS) and used the environment Vray Toon effect to get the toon lines. That seemed to work better for me.
Below are the character texture results without Toon Environment effect. These texture tests were done to see how the material and object looked before diving into the actual stylistic outlook of the renders. Scroll down to see the difference with the Toon Environment effect.
Basic Textures done during the term break
Textures with VRAY Toon environment effect
As you can see above, these renders have an outline with the toon effect. I played around with the width of the line to see how the thickness affects the end result. From what I've tried, if the width pixel is set to 5, the closer the camera is to the object the thicker the line will appear, and the further you are from the object the thinner it will appear. Hence, i will have to look into what line width works best for every shot before rendering.
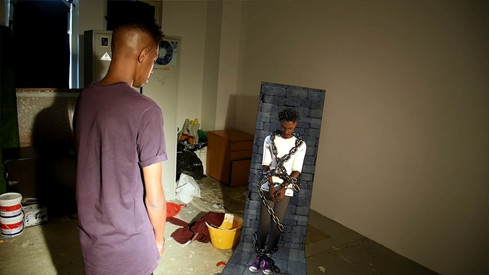
CG shot
Although this shot will only last for 2 seconds on screen, these are the number of iterations it needed to go through for approvals and fixes before rendering.
I was finally able to render it in the last few days of the break and get the shot done by the first two days of the trimester. Here's what the final shot looked like.
Progress updates for this week
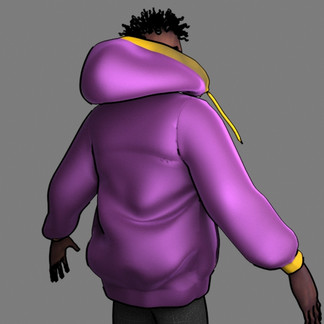
As for this week, I felt the need to add a little more to the jacket and detail some parts more. On receiving feedback to add some seam lines to the pants, this is what I arrived at. I also modeled a zipper as that was a missing element on the jacket. I am quite pleased at the result now.
As you can see, our graphic designer had finalized the logo for the team and I used that as "branding" for the jacket and the pants.

Social Media update
Over the break, we had been hyping up behind-the-scene posts and have received a lot of love and support. Below is a screenshot of what we achieved during the break.

Each week had posts designated to one discipline. Starting from the bottom, we had animation posts (3 posts per row), followed by film related posts, then audio and lastly design. We left design for last so that we can archive the posts and start with the integrated campaign with a BANG! We also published our logo in a great reveal. Scroll below to see!

Here, we officially start our account as PROJECT LOUDER! On updating our profile picture, we received a few more followers. The team had thoroughly discussed and planned ideas on how to efficiently and effectively convey our message to our target audience. Follow us on @project.louder if you haven't already!
The middle post is animated. It's a must watch!
In class homework
For this term, we are expected to create and maintain a Quality Assurance Checklist which will have detailed segments and list items of ways we can strive to work towards better quality. This is what i came up with for the week.
Quality Assurance
Optimization
Rendering/scene efficiency
LOD - level of detail
Facial Morphs only for scenes where we have changes
Simulation for jacket
cloth simulation for more realistic reactions
Kite flying simulation - wind
Weather simulation for the OMELAS shot
Lighting
Lighting build up in ACT 1
Paradise lighting with purple aesthetic in ACT 2
Nighttime lighting in ACT 3
Flicker for TVs - whether to do it in 3ds max or in post
Post production - color grading, effects, transitions, vfx cuts, neon
Beginning and ending of paradise MV, effects and edits
Filming parts will be done with FILM department in Project Louder
Eye transition will be a vfx edit
Match cutting at the end should align with editing style of the full film - will work with film
I still have to carry out more research into these but for now, this is what i have.
Next week
The way things are going, it seems as though Amos will be out of the team. This left me with extreme anxiety since I'd have to go solo hereon. However, I reached out for help as I knew I needed guidance on this and how to tackle it henceforth. i was advised to derive a plan for a solo project by cutting down the scope of the project and making it fairly doable. I will work on my schedule for the term and will update my advisor in our upcoming meeting.
As for now, things seem chaotic in my head but I am getting the necessary help I need. I hope with that I will be more motivated to work during the course of this trimester and give it my best! Until next week...


Comments