Week 7 - Getting back on track
- Leighanne Fernandes

- Aug 1, 2020
- 3 min read
Updated: Sep 3, 2020
I tried my best to hustle this week due to the feedback we were provided on being extremely slow last week. I could foresee that if tasks weren't completed on time, it would severely affect the whole project. So I picked up the pace.
Modeling/Sculpting
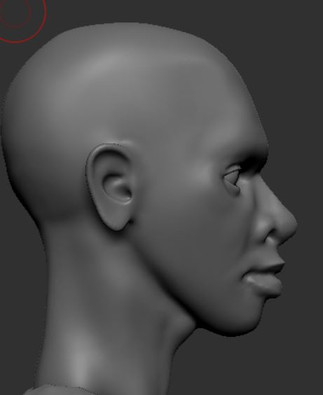
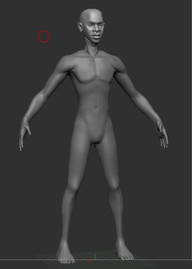
This week I got started on the modeling and sculpting straight from Zbrush. I personally feel it to be a much faster workflow to start off in Zbrush directly also because I enjoy sculpting free hand without worrying about topology at the beginning stages. I have also developed a better speed and accuracy for Zbrush sculpting through past trimesters' personal projects and competitions I took part in. Hence, I was surprised at myself for finishing the base sculpt in less that 3 hours. These were my first draft that I sent for approval.
Received feedback on them to make changes to the armpits because they feel like part of the body but should be indented a bit more instead. Received a lot more feedback on the face (below in bulleted points) and here were the changes made to them within the day.
Ear lobe anatomy needs to be fixed
Nose Flare needs deeper cut, nostrils deeper, move it upward
Change the shape of the nose in front view to match the actor's, looks Caucasian now
Since most of the body will obviously be covered in clothing, I didn't have to worry much about proper muscle anatomy so I proceeded from here. I am actually very happy at how these turned out after refining through feedback and I'm a bit impressed at myself for the speed at which I can work in Zbrush now (yay!)
Shoot
Wooohoooooo, the day of the shoot had finally arrived!!!! I was so excited for it as I could finally live my dreams of being an art director/ set designer for a passionate project!! It has always been and will always be a dream to art direct & design a set for shoots and projects. Below are some time-lapse videos of me designing the place up...
Dressing the place up to look deserted, worn down and warehouse-like.
Acting as a placement for lighting and (acting) blocking setup.
One of the behind the scenes shot in action.
I will probably be editing these into a behind-the-scenes video footage later on.
Retopology in 3D coat - self directed learning
So, Retopology is something I've always dreaded for the fact that its tedious and needs 100 percent precision all the way through - basically, its getting down to the technical stuff which I lowkey hate. Since we are going for an animated short, it is crucial that all the loops work well for animating and this is something I didn't know would take so long than it did. It took me three and a half days to complete this - one full day for the face (oh my!), one day for the body, and one and a half days for the ears and hands!
Also being my first time using 3D coat, I needed to familiarize myself with the tools and the user interface although it was fairly simple and straightforward. Below are screenshots of my work-in-progress.
I just want to say what a wonder the symmetry tool can be at times! Saved half of the time it would have otherwise taken if it didn't exist...
Here are the videos I used to learn from.
(3DmotiveHD, 2014)
(Danny Mac 3d, 2018)
I was supposed to be done with the clothing this week but I sort of underestimated the time and effort it takes for other tasks leading upto it. Thankfully, the progress was good up until now and we are set on the right track. Phew!
References
3DmotiveHD (2014, Jun 4). Basic Retopology Using 3DCoat - 3dmotive [video]. Retrieved
Danny Mac 3d (2018, Apr 4). How to RETOPOLOGIZE the BODY - Part 2 - Body Retopology
[video]. Retrieved from https://www.youtube.com/watch?v=Y-Ak66N0cAw


Comments